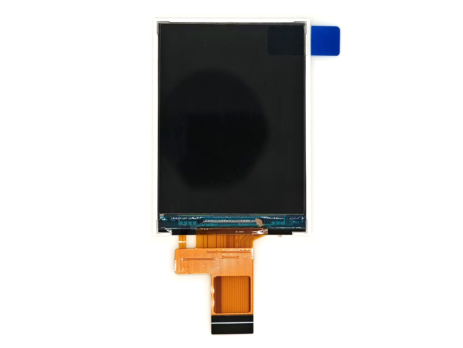
Adventures with an 8080 LCD
A couple of months ago, I had a project that called for a low-cost LCD. After reaching out to several suppliers, the most affordable option was a 2.4″ TFT screen with an 8080 parallel interface. This interface has six control pins (including reset) and eight data pins. By toggling the control pins and setting the data pins, I control the LCD.
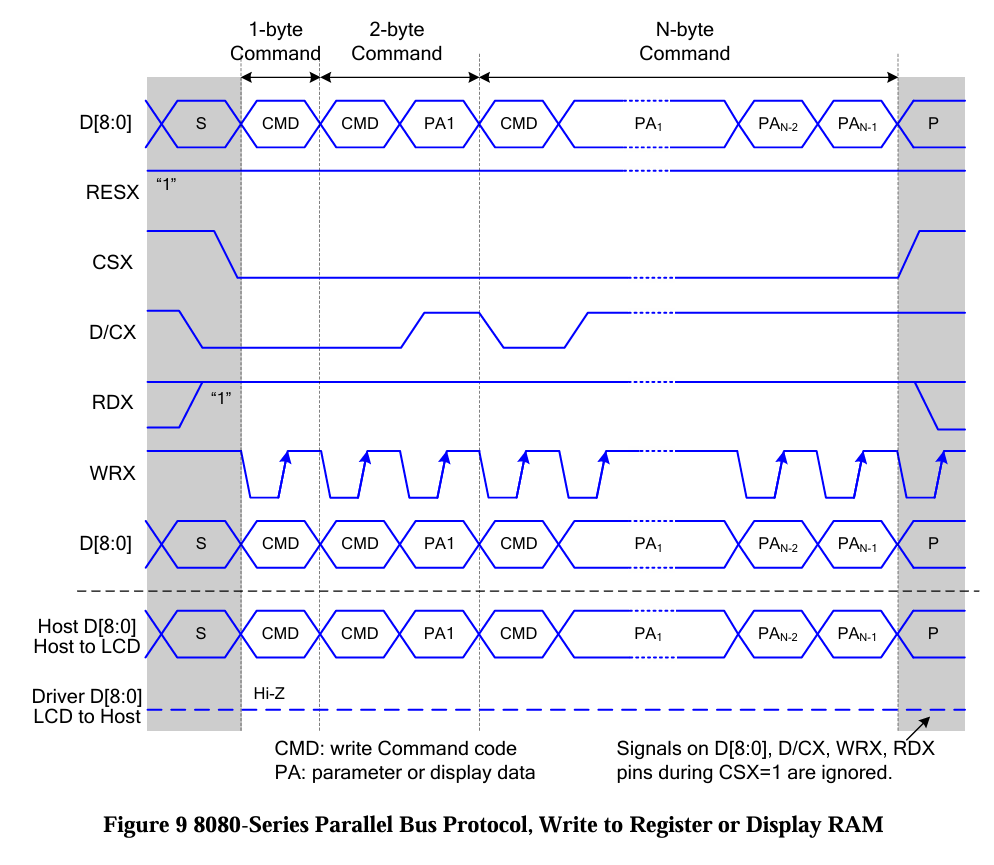
This LCD uses an ST7789P3 control IC, which needs to be configured on each boot because it lacks persistent memory. This is common with many LCDs and can cause a lot of frustration when setting up a new display. I initially used the Arduino GFX library for controlling the LCD. There’s a generic ESP32 8-bit parallel interface in GFX, but let’s take a step back to understand how the library is organized.
Arduino GFX Library Structure
The Arduino GFX library has a layered structure, known as a hierarchy in Object-Oriented Programming:
- Databus Layer: This layer specifies the physical connection between the MCU and the LCD and handles sending and receiving commands. It’s where all the GPIO manipulation happens and is a key factor in data transfer speed. Poorly optimized code here can drastically slow down LCD performance.
- LCD Layer: This layer includes control IC-specific code, encapsulating initialization routines and offering convenience functions. For example, instead of sending
WriteCommand(0x29);, you can simply calldisplay_on();. - GFX Layer: This layer defines the drawing functions, like
DrawLineandDrawBitmap.
Now that we understand the library’s structure, let’s look at how this LCD works. The LCD has memory for every pixel, and this memory is copied to the display at the refresh rate. For instance, at 60Hz, the memory is transferred to the LCD, one horizontal line at a time, 60 times per second. You can write to this memory at any time without synchronization. In fact, the GFX library doesn’t synchronize data transfers—it directly writes to the LCD memory when you call the drawing functions.
Setting Up the LCD
The initial setup for this LCD required adapting the Arduino GFX library. My first challenge was getting the LCD to initialize. I needed a read function to check the memory of the ST7789P3, which wasn’t included in the GFX library. By sending commands and checking the responses, I discovered that my initialization wasn’t working—commands were sent but had no effect. Eventually, I found a workaround: performing a read command, then sending the initialization code, which worked. After that, the LCD responded as expected.
Speed Issues with the ESP32PAR8 Implementation
The ESP32PAR8 implementation was too slow for my needs. The ESP32’s GPIO is fastest when accessed directly through registers. Here’s a quick example:
GPIO.out_w1tc = 1UL << PIN; // clears a bit
GPIO.out_w1ts = 1UL << PIN; // sets a bit
For now, that’s all the changes I had to make to the GFX library to make it work reasonably well. Then I started writing a flappy bird style game… well Ok, literally it was flappy bird.
Building Flappy Bird
I was able to get a playable version of Flappy Bird with two pipes on the screen, an animated bird, and a scrolling ground effect. However, adding parallax (background scrolling) was too slow. The game was fun, playable, but not smooth with background scrolling. Here’s where I started exploring performance optimizations.
Optimizing for Speed: Challenges and Solutions
Now we start down the rabbit hole. How can we speed up the game? What are the limitations and bottle necks? This was an iterative process but I’ll skip to the results. Using Arduino GFX library is not great for games with this LCD. It has all the functions but they are too slow to produce smooth games and, a bit more forshadowing, there is no memory write synchronization.
Screen update time.
The more you draw on the screen, the longer it takes to update. Any calculations you have to make to decide what to draw on the screen slow you down even further. The total refresh time is the total time is both preparing the data and writing to the LCD. Remember Arduino GFX library is slow, so we have to be very careful how much we write to the the screen. Let’s look at flappy bird for a moment.
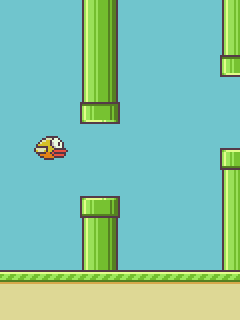
We have pipes that scroll left, a bird that goes up/down and 3 rows of pixels on the ground that scroll left to give the effect of movement to the bird. Let’s look at each in turn. How do we setup the screen at first?
- Draw ground
- Fill sky with blue
- draw the bird
- Draw the pipes
If we were to do the same procedure for every frame we have horrible flashing. So we only update what changes from one frame to the next frame. Pipes move 2 pixels at a time to the left, so we calculate the new position, cover only the last 2 pixels of the old pipe location with sky and redraw the pipes. Now we’ve only had to draw PIPE_WIDTH + 2 pixels for each pipe. Similarly we have to fill in the old bird position with blue, then draw the new bird. Depending on bird vertical speed it’s at most BIRD_HEIGHT/2 * BIRD_WIDTH pixels. Add 3 rows of pixels for the ground and where are we at? 36*34 (Bird) + 42*190*2 (pipes) + 3*240 = 17904 pixels, worst case. We have 240*320 total pixels so we are writing about 23% of the screen. Call it 25%. We can only write 1/4 screen each frame or we get flashing. This works, we have a playable game, no flashing and it’s arguably fun. Minimum viable product done.
We could end here, call it a day and show our friends our cool Flappy bird game. Of course I did do that but was not completely happy with the result. I wanted a scrolling background. Why is that so hard? First problem, it’s more pixels to draw. If we use a 70px high background, we’ve added another 25% to the pixels we need to write every frame. We will have flashing for sure! But the problem doesn’t end there. We have to scroll the image, so we have to offset the image and wrap aroud to the other side of the screen, but the worst is yet to come. So far our bird has just been flying over blue sky, so the image of the bird has blue background pixels. You see the problem?

Not only do we hide our background with the blue pixels in the bird, we hide them with the edges of the pipe graphics as well. To solve this problem, we have to check every pixel of the bird to see if it’s blue, and only copy non blue pixels to the LCD. That way we don’t overwrite the background.
Implement a Screen Buffer
Ok we know the problem to be solved, but how do we do it? Step 1 ditch the Arduino GFX drawing functions. We need a faster way to draw the screen, so we implement a buffer. Luckily there is enough room in the ESP32S3 Ram for a buffer with 2 Bytes per pixel, which is the default format for our graphics. It’s called RGB565, here is a link to an image converter I use, but we won’t get into that right now. Enough to know we now have a chunk of memory equal to the size of the LCD.
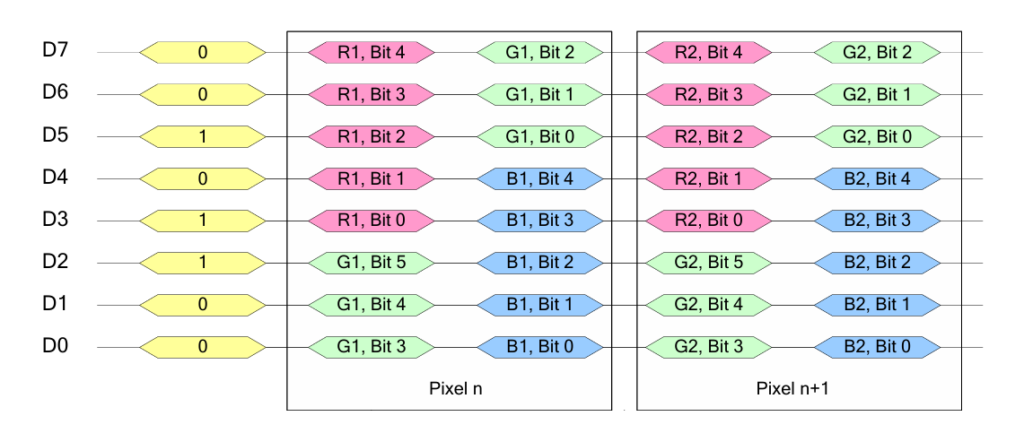
Now we can draw our frame in memory. Why is that helpful? It’s helpful because we can relatively quickly write an entire frame to the LCD in one go. This uses a low level function, and after optimization, sends a frame in 30ms. This in theory could get us 30fps, more than enough for flappy bird. The in theory part means we’d somehow have to magically do all our drawing to memory in 0ms, more foreshadowing, to achieve that frame rate. But let’s keep going, one step at a time. Now since we aren’t using Arduino GFX library (except for a custom low level function to dump the entire frame to the LCD) we need to somehow “draw” our frame in memory. This is actually easier than it sounds. We have all our image data in memory already. We just need to copy chunks of it to various memory location that represent individual pixel locations. If we use an array of 16bit values (2 Bytes) then we can find any pixel with this formula:
buffer[y_coordinate * SCREEN_WIDTH + x_coordinate]
Now that we can find any pixel, we just need to copy image data from one part of memory to another. We need some helper functions that make this easier.
- Copy image to buffer at location x,y
- Scroll image by x pixels, place it at location x,y
- Copy part of an image h,w to location x,y
- Copy image to location x,y and mask out color c
These functions loop over arrays and compy data in chunk with memcpy() to the frame buffer. It turns out if you draw each frame in memory it takes about 15ms, add to that 30ms to write the frame to the screen, we have a game that is playable and doesn’t flash.
Time for a graphics overhaul. I don’t want to make flappy bird, I want my own game based on a unique character. Time to enlist the help of Game Designer extrodinaire Ray Larabie. Ray was kind enough to draw me up some amazing graphics based on “Shiverwing”, an ice dragon. Shiverwing usually finds herself pushing ice blocks around her caslte filling up meteor holes, but sometime she gets out for some flying around!
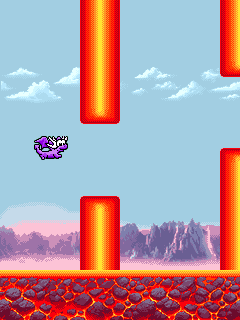
Now we’re talking! 3 layers of scrolling, ground, mountains and clouds, a flying dragon and some fire columns. All done right? Not so fast. Remember the 30ms it takes to draw the screen? What do you think happens to button inputs during that time? You guessed it they don’t update and can be missed. That’s a bummer. It’s all well and good to have a pretty game but if it doesn’t play smoothly, what’s the point?
Multi-threading
The ESP32-S3 has 2 cores. One is sitting idle all the time! What if that core just handled the drawing of the buffer to the screen? /Then we could still watch for button pushes during that time. Sweet! Let’s code it up. It might occur to some of you at this point that I’m polling the button and not using interrupts. That’s true and part of a discussion for another day.
To accomplish our multi-threading we need to write a looping function that only transfers the buffer to the LCD and ssign it to the second core.
xTaskCreatePinnedToCore() is the function to use and basically that’s it. You can check the code for the specific syntax. For now it’s enough to know we have a function that offloads the screen updates so we can keep monitoring the button. Sweet now that that’s done, we can call it a day right? Well not so fast. We have solved the button problem, but we still have an issue, the frame can’t be written to the LCD until it’s fully drawn into the buffer. We still have a total frame time of 15ms to draw it in the buffer and 30ms to write it to the LCD. 45ms per frame. It’s playable but barely. Can we do better? Can we get to 30ms per frame total? Yes and no and again yes and sort of. This is a story of how I did things but there is a better way to approach this. The ESP32-S3 has an 8080 interface peripheral that can update the LCD faster than we can by using GPIO directly even when using direct registers to twiddle the GPIO. This is not so straight forward and would be best done outside the Arduino framework. Since I started with the goal of getting a simple flappy bird working, I didn’t want to setup the toolchain and learn the peripheral interface. This is a spin off of another project that needed this LCD and there was no reason to invest the time in coding. I do plan to get this going with the 8080 peripheral to see how fast it can be. I think it’s under 15ms for writing a frame. For now though let’s get back to our Arduino story and see how far we can get.
Double Buffering
Enter double buffering to the rescue. This just means we have 2 frame buffers. We can be transfering 1 buffer to the screen while at the same time, with our second core, drawing one frame to memory. This way we can really get our frames to 30ms each! Ok so 77k per buffery, let’s allocate 2 buffers and… wait a second, compile errors. What’s going on? We simply don’t have enough ram in the ESP32-S3 for this size of double buffer. Crap. Dead end. Not so fast, we can get an ESP32-S3 with 8MB PSRAM built in for another $0.5, that’s more than enough for our double buffering. How do we implement a double buffer? Simplest form is we have 2 buffers, a flag to say the frame is ready and something to say which frame is the one that can be written. It turns out it’s only a few lines of code to implement this. The output_frame function checks if a frame is ready, wehn it is, it updates the frame to write, resets the frame_ready flag and then outputs the frame. The draw frame function simply waits for the frame ready flag to be flase and the writes the next frame.
Now we have achieved very smooth gameplay with 30ms total time per frame using double buffering and multi-threading. We could call it a day, but there is still a few days before Maker Faire and there is a problem I haven’t mentioned yet but it’s a biggy. It’s called Tearing.
What is Tearing? It’s the effect of having the screen update while frame memory is being updated. You end up seeing part of two frames. Like this:
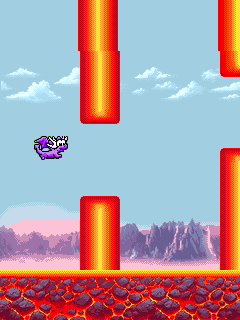
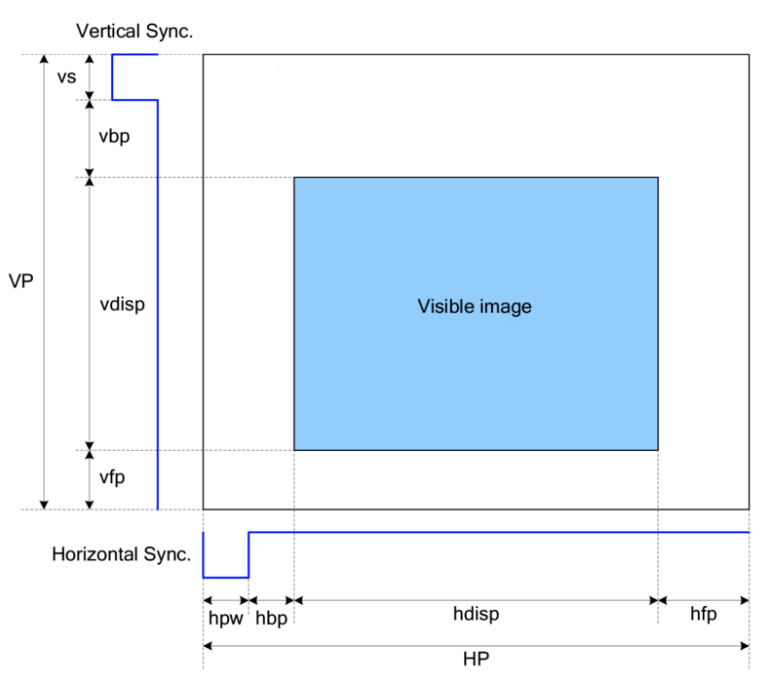
This is a very hard problem to solve with the current implementation. First, we don’t know when the screen is updating. Second, the screen updates at 60Hz, or 16.66ms per frame but we take 30ms to write each frame. We are able to lower the frame rate, but there are limits. 39Hz is the lowest frame rate listed, though by adjusting back and front porch settings we can in theory go lower. First problem is we don’t know when the frame is written to the LCD from memory. This can be solved by enabling Tearing signal on the LCD controller. This will set the TE pin high at the start of every frame. It’s often called ther vertical sync pulse. Now we can synchronize the frame update.
Further Improvements
- Reduce the frame rate by increasing porch durations
- Reduce the amount of data in a frame
- Speed up our frame writes
Each of these has a number of complications. I’ve done some playing with the porch setting but this will need time to look at the signals on the oscilloscope and see actual timings of each signal. There is a way to reduce the frame data from 2B per pixel to 3B for 2 pixels. If we cut the data by 1/4 we cut screen update time by 1/4 also. This is a great option as we don’t have more than 4k colors, so there would be no degredation in visuals. It does mean all the graphics and helper functions would need to be re-writen. There is another benefit as well, I think we would then have enough room in regular ram for 2 buffers and wouldn’t need PSRAM anymore. Next would be to implement code that uses the 8080 peripheral, but that means re-writing much of the program. I think by combining the last 2 options we could achieve a full 60fps with no tearing.
To be continued…


